The Interested Parties
Who are the Interested Parties in the system?
The “Interested Parties” are stakeholders that can be individuals or organizations that have an interest or concern in a business, and who can affect or be affected by the business’s actions, objectives and policies. Interested Parties can either be billed for a fee or receive payment for a billed fee. The interested parties in the system are;
Plan Sponsor - An organization that sponsors a single plan or multiple plans for its employees.
Service Provider - An organization or individual that offers its services for a fee.
Advisor - A person who provides advisory service to the plan sponsor.
Third Party Administrator (TPA) - A business that administers certain aspects of employee benefit plans for an organization (employer). The TPA works with the employer as well as the individual to communicate information between the two.
Other - Any Interested Party other than the above listed.
The “Interested Parties” Page
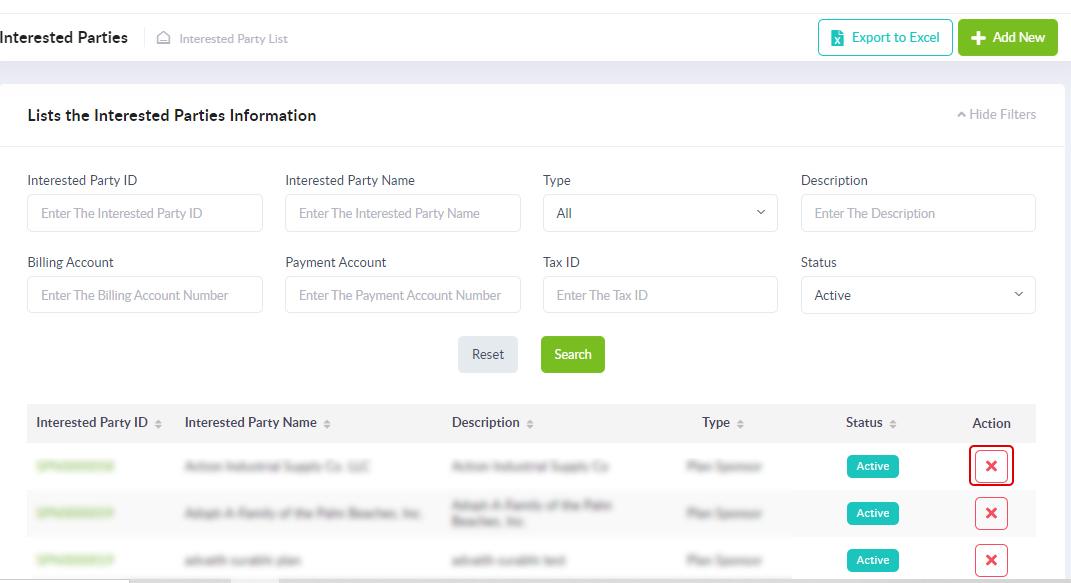
The “Interested Parties” page under the “Billing” functionality, has the following features,
List the active Interested Parties
Create new Interested Parties
Export the Interested Parties list to excel
Filters to list the Interested Parties categorically
Sort the Interested Parties list according to the header
Deactivate an Interested Party
Listing / Viewing the Interested Parties
To see the list of all Interested Parties, access the “Interested Parties” section under the “Billing” functionality. The page displays the list of all active Interested Parties.

Creating a New Interested Party
To add a new Interested Party, access the “Interested Parties” section under the “Billing” functionality and click on the “Add New” button.
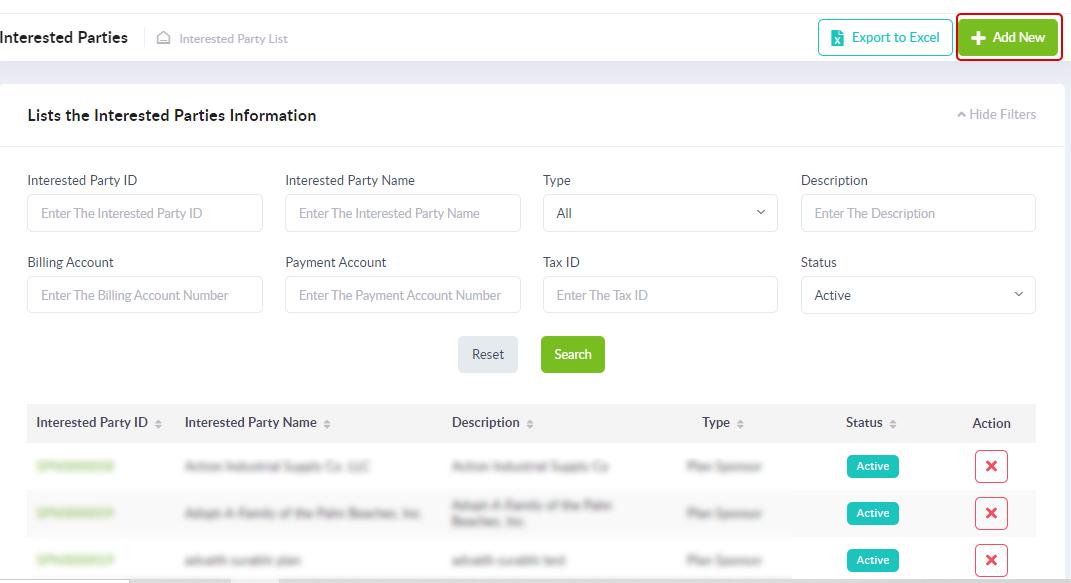
On clicking the “Add New” button you get the “Add Interested Parties” page, where you can enter the required information to create a new Interested Party.
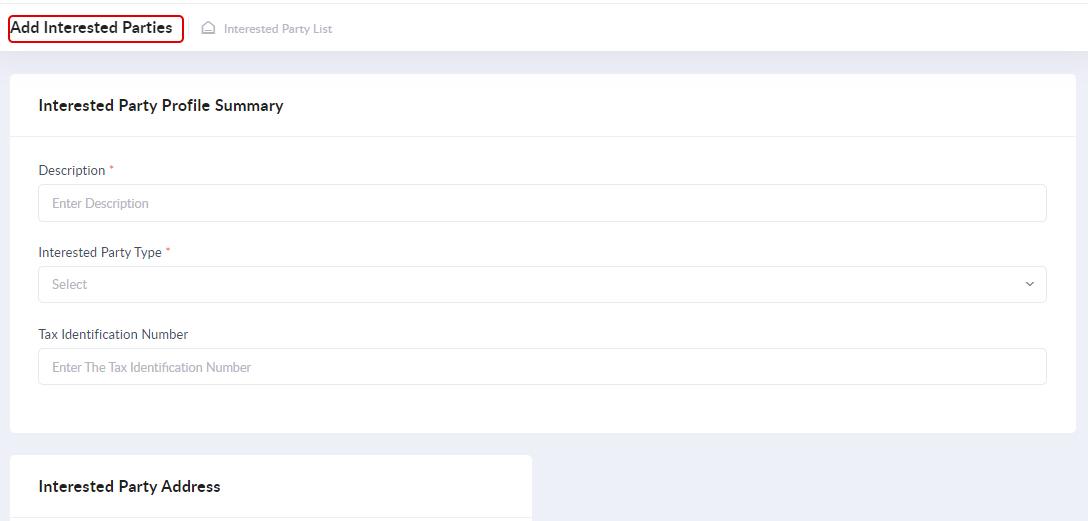
The below tables list the details to be filled in.
Field Name |
Description |
Description |
The Interested Party description can be entered in this field |
Interested Party Type |
Choose from the drop-down list the Interested Party type (Plan Sponsor, Service Provider, Advisor or Third-Party Admin). |
Tax Identification Number (TIN) |
The TIN is a 9 digit all numeric field that is entered here. |
User Group |
Choose if the Interested Party is an “Entity” (business) or a “Person” (individual) |
Entity Name / First & Last Name |
Based on the User Group selected, enter the business name if “Entity Name” was chosen or the First and Last Name if it is an individual. |
Contact Address, City, State, Zip Code & Country |
Enter the contact address by providing the details in the respective fields. |
Same Billing and Mailing Address |
If the mailing and the contact addresses are the same, check the box in this option, alternatively, uncheck the box. |
Mailing Address, City, State, Zip Code & Country |
If the “Same Billing and Mailing Address” checkbox was unchecked, the fields to enter the mailing address gets activated and the details can be entered. |
On clicking the “Save” button, the system brings up a popup that prompts you to enter notes on the actions performed, which gets saved for future reference. You can enter the notes and click on the “Update” button to save the created Interested Party.
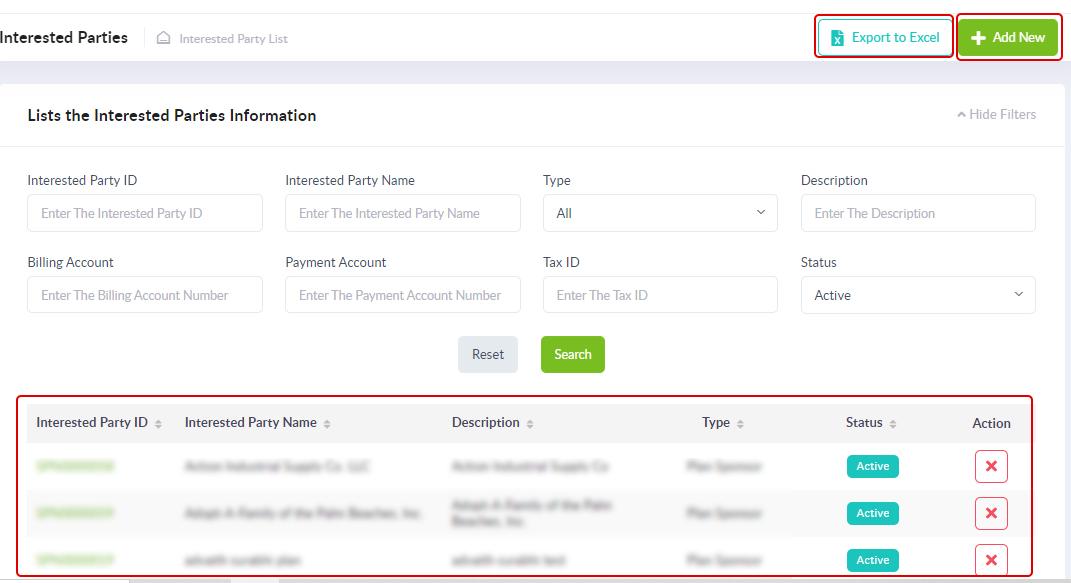
Exporting the Interested Parties List to Excel
This feature lets you export to an excel file the list of Interested Parties. To use this functionality, click on “Export to Excel” button.
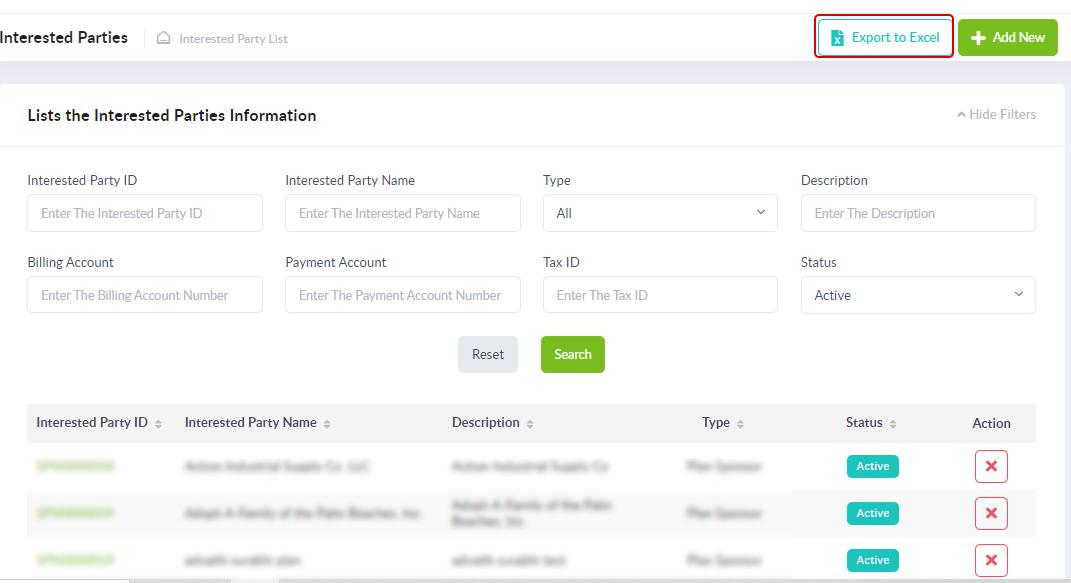
The list of all active Interested Parties is generated and output to an excel file that will be saved locally on the system.
Note: If you would like to export to an excel file the Interested Parties list based on or more criteria, you can filter (see below on how to use the “Filter” feature) the Interested parties based those criteria’s and then export the list. This generates the excel file based on the chosen criteria.
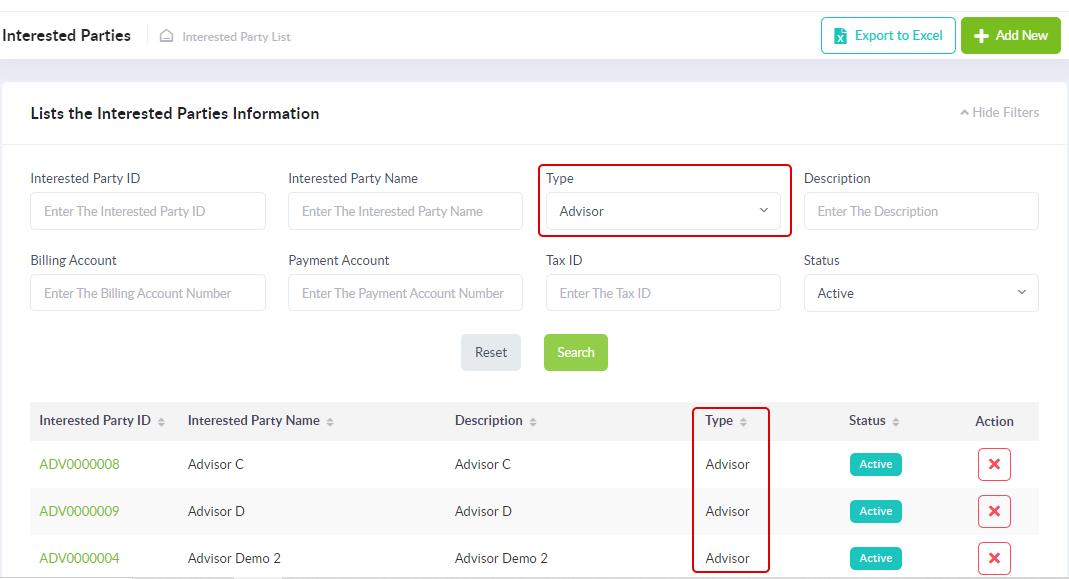
Filters to List Interested Parties Categorically
You can list the Interested Parties based on the filtering categories you choose. To use this feature, choose the categories on which you want to filter the list and click on the “Search” button. This generates the list based on your filter.
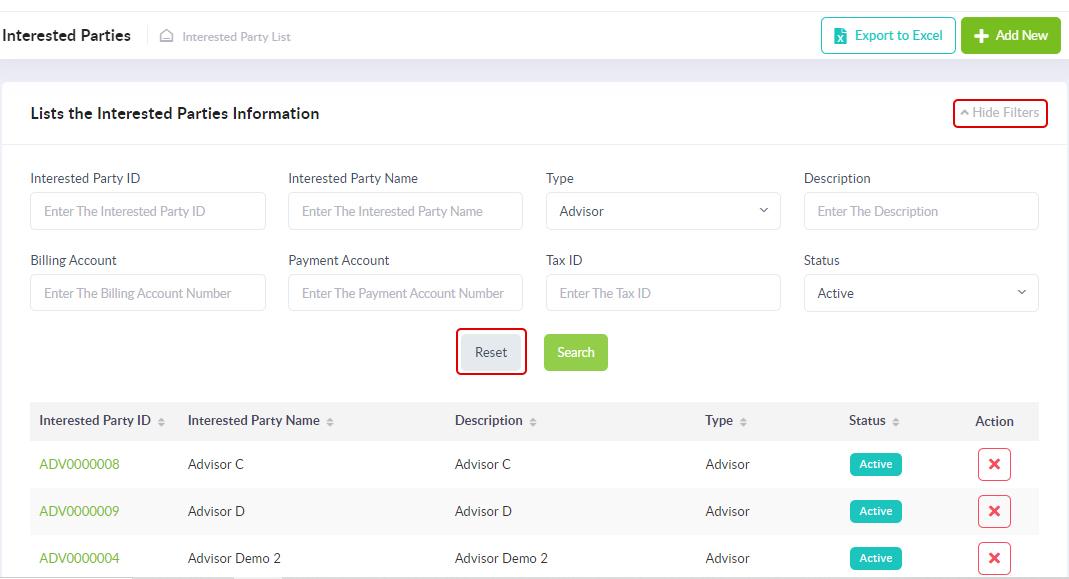
To remove the filters, click on the “Reset” button, and to hide the filter feature, click on the “Hide Filters” option (an option that toggles between Show and Hide Filters).
Note: All deactivated (Status: Inactive) Interested Parties by default are not listed on the page. To view the deactivated Interested Party, in the “Show Filters” categories, choose the “Inactive” option from the drop-down list under “Status”. This will bring up a list of all “Inactive” Interested Parties.
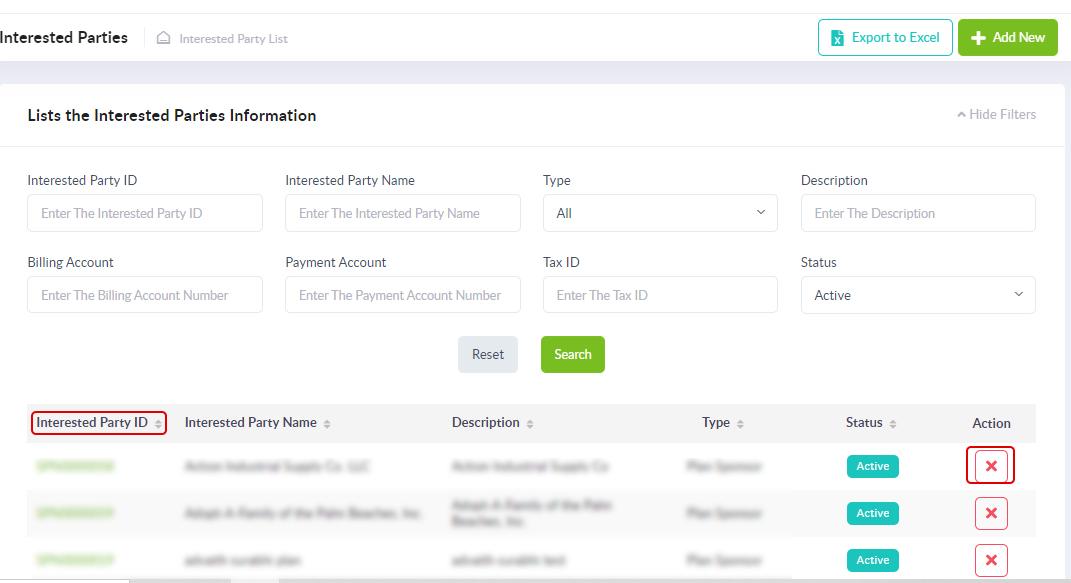
Sorting the Interested Parties List
You can sort the Interested Parties list to arrange it systematically. To do this, click on the up-down arrow shown against the header, whose details you want sorted.
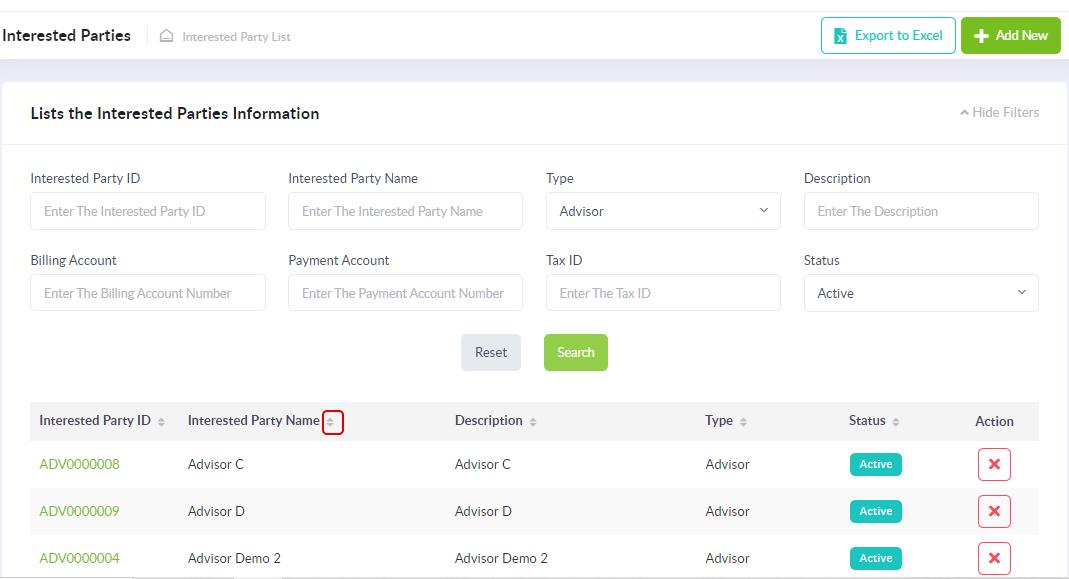
The sorting can be done in two distinctive ways.
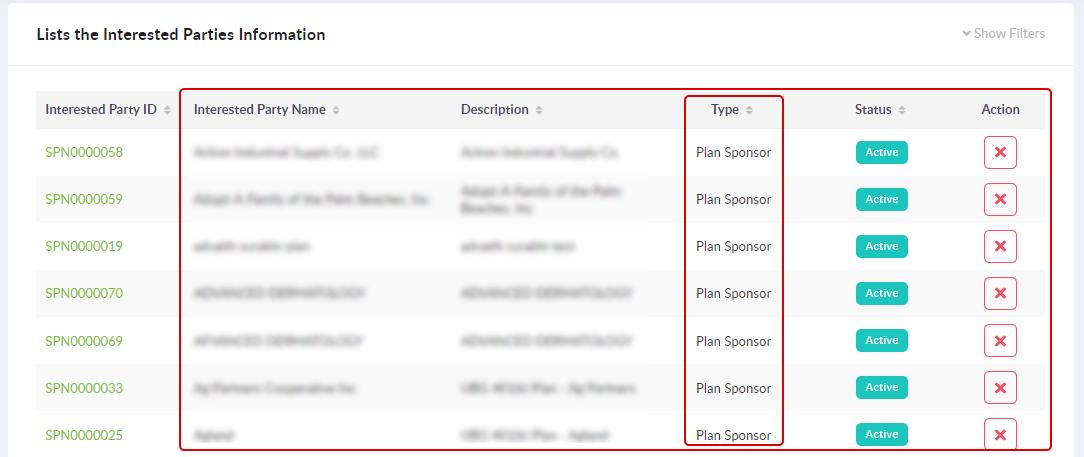
One is to sort the list in a sequenced order by a criterion, say, sorting the list based on the “Interested Party Name”, would list the Interested Party Name in an alphabetical sequence.

The other sorting method is grouping the list based on similar properties.
In the below image, when the Interested Parties are sorted on the “Type”, we get the list sorted according to the Type (Advisor, Plan Sponsor, Service Provider, Third-Party Admin and Other) of the Interested Party.
Deactivating an Interested Party
An Interested Party account can be deactivated by clicking on the “X” (deactivate) action button.
When you click the “X” (deactivate) action button, you will get a “Confirm Deactivation” popup box in which you can enter the reason for deactivating the account and click on the “Deactivate” button.
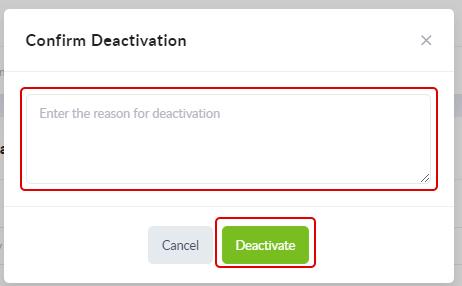
Once the Interested Party has been deactivated, the “Status” changes to “inactive” and will not be viewable on the Interested Parties listing. The inactive Interested Parties can be viewed using the “Show Filters” options and indicating the “Status” type as “Inactive”.